Wednesday 29 June 2011

Creating my illustration and design board from dress design..

As part of our final end of year brief we have to create a design board and illustration board to convey our dress design through our research and inspirations...
Looking at my final dress design above for my design board it must be more technical than my illustration board as a illustration is more abstract and uses a range of different medias.

Below is my design board I created today showing the front, back and side view of my final garment:


Below is the beginning on my inspiration board it shows circles to convey my ' celebrating curves theme' and the lines coming of the illustration I sourced my inspirations from the work of Martin Rubella...


Final Evaluation...

Olivia Mullin

Final Evaluation: Materials, Techniques and Processes

As part of the current unit I have been studying I have learnt to use and find the values of different materials and how they can be used in garments weather they are suitable to fit purpose. As part of the brief I had to design a dress based on ‘ Equality and Diversity theme, I got given sexuality to base my dress design around. From this I developed my final garment from my inspirations and research.

Firstly I began to research into a diverse range of illustrators because my theme had to convey sexuality the illustrators I researched needed to show feminine lines, motion of sexuality and facial expressions that also conveyed sexuality. One illustrator in particular stood out to me Manuel Rebollo he uses graphic’s through many of his illustrations which foreshow sexual poses, from this illustrator I then got the idea of ‘Celebrating Curves’ for my final theme looking at the circular shapes in his illustrations gave me the inspiration to convey circular curves through my garment. I then looked at similar illustrators from the likes of Akari Inoguchi, Nuna Dacosa with conveyed curvy feminine lines but using different techniques and medias.

I experimented with some of the illustrators work using pencil to sketch, black fine liners to pick up certain lines in the illustrators work and to show my understanding of graphics and the use of photo shop so I experimented with shapes and air brushing. I found it hard sometimes to find certain information on illustrators this was often when I had to say what the illustrator was conveying or how they found their inspirations so I found some of the information in Library textbooks rather than just using the internet as they are more of a reliable source.

As part of the brief I had to select my final fabrics I had to put together a colour page that was influenced by my design methods, whilst I was researching into different things that influenced sexuality. I came across Cleopatra this gave me a very rich colour pallet with beiges, gold’s, and blacks I felt the gold’s conveyed the sexuality through my garment Cleopatra also influenced me to create a number of layers on my garment as all of her head pieces stood out from all the embellishments.

Once I Had a strong colour pallet I had to research into a range of fabrics and the suability to my final designed garment. From looking at the brief I researched into fabric shops in Manchester and came to the conclusion of going to Abakan, when I went they had a very diverse range of different fabrics that would suit my garment I needed to take into account the price per metre, How much material I will need, the stock number, and are they hard materials to work with? As my garment was quiet structured with the straps holding my garment in place I needed my fabric samples to be strong I showed this evidence in my sketch book and discussed with my tutors what would give me the best outcome before buying my final fabrics.

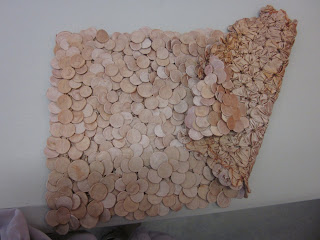
Once I had found the right suitable fabrics for my garment I looked through Haute Couture books that helped me sample throughout my sketch book, I came to a conclusion that suffolk puffs would be the best method for me to attach to the straps of my garment. I also experimented with different methods I found in the Haute Couture book evidence is found in my sketch book.

Carrying on from this I began to create my final garment put of my final fabrics and adapted pattern pieces I found this very challenging as I do struggle with pattern cutting however by taking my time and working on each step with extra care I managed to get my garment completed!

Something I particularly liked doing whilst doing this unit was my toile diary I found this helped me a lot in the progress of making my garment with labeled pictures of each step and if there was a problem how I overcame it. I also enjoyed seeing the outcome of my dress on the catwalk as I put a lot of effort into creating the suffolk puffs although it was a long hard process once they were added to the straps of my garment they looked well worth it!

Overall I think I have enjoyed this unit the most as I feel I have achieved the most out of it. My dress making skills have improved this will then help me in my second year of fashion if I wanted to make a dress for my final year collection. Seeing my garment on the catwalk was great as I feel it gave me at sense of achievement and that all my hard work had payed of. I also enjoyed working with the models in the fashion show they were all lovely girls and helped to show of every ones garments.

In conclusion to all of my work over the past two months I have learnt new dress making skills, where to source the best fabrics for making garments, how to put together a toile diary, and learnt more about how catwalk fashions work! I feel I can take these skills to my second year. However there was certain aspects I did not enjoy for e.g. finding illustrators to suit my theme however I overcame this by looking at a range of illustrators that include graphic work and computer technology in there illustrations as I am interested in graphic design.

Tuesday 28 June 2011

More Fashion Show Pictures!


Is it really a surprise Jane Norman has gone into administration?


More than 1600 jobs at risk, debts of 140m but didn't they see the signs that they were simply not moving on with the times?

These days big fashion retail stores have to be on top of the game to sell in this current economical climate. With the credit crunch hitting Britain hard people think twice about digging into their pocket for a branded garment. Jane Norman is in the middle sector of the high street market however their garments can still be quiet pricey for the average person as a pose to Primark where the store offers cheaper more affordable fashions for the FAD market.

However just because people are not digging into their pockets as much as they use to there is still a huge demand for middle sector high streets brands. From the likes of Miss Selfridge, Topshop, and Topman have jumped in sales over the last 12 months to 13% this is a massive£213.6 million!! Recession? what recession?

Jane Norman, Top-shop, Miss Selfridge, Top-man, and River Island all aim at a similar market with clothes all in the same price range aiming at similar target audiences and having stores in the same towns these shops are all competitors. With all the other stores boosting their sales bar Jane Norman what really did go wrong?

Its all to do with how you market your store, have you moved on with the times? advertising campagins that remind consumers your store is out there, promotions loyality cards student discount where is this with Jane Norman? When I was younger I can remember buying a nylon patterned top from Jane Norman..


Very similar to the one above was lovely at the time but when fashion moved on I wouldn't even step out my front door in it! I was so happy to go into school with a carrier bag with the logo Jane Norman in printed on it. However that was at the time! The Jane Norman bags have never changed in a period of 3-4 years there not telling the consumer any different the store has not experimented with different styles, shapes, or colors believe me I'm a young girl I know!. I could walk in the shop today and buy a nylon top similar to the one I did four years ago. To put it bluntly I would be hanging me head in shame at the thought of wearing a nylon top marked with the Jane Norman brand!

In order to move on with the times and stay in this tough market. Every day your store needs to be offering new shapes in garments, experimenting with color and having a very strong marketing campaign that screams out to consumers to buy your garments. Without this in the recession the store will be a epic fail.

Monday 27 June 2011

End of year fashion show :)

This is how my final garment looked on the catwalk I was pleased with the outcome!
However before my garment went on the catwalk I had to make some adjustments to ensure nothing went wrong on the cat walk.
- I made sure all my powder puffs had a extra tacking stitch so they would be held in place securely on the catwalk!

- To hold the straps in place I added poppers this worked well as they were easily adjustable.

Tuesday 21 June 2011

The best friends work...

My friend is currently studying Art and Design at Mid Cheshire for her first year and next year is going to be doing photography! I thought her work was really good as she used many textile techniques I am familiar with..

Lauren's task was to create anything she liked either in textiles or ceramics. Her chosen theme was textiles. From speaking to Lauren she sourced a lot of her inspirations from recycled clothing. From her inspirations she then used recycled sacks, sweet wrappers etc to create a final dress. She named her work 'foraged fashion'
This is Lauren's design being developed... 
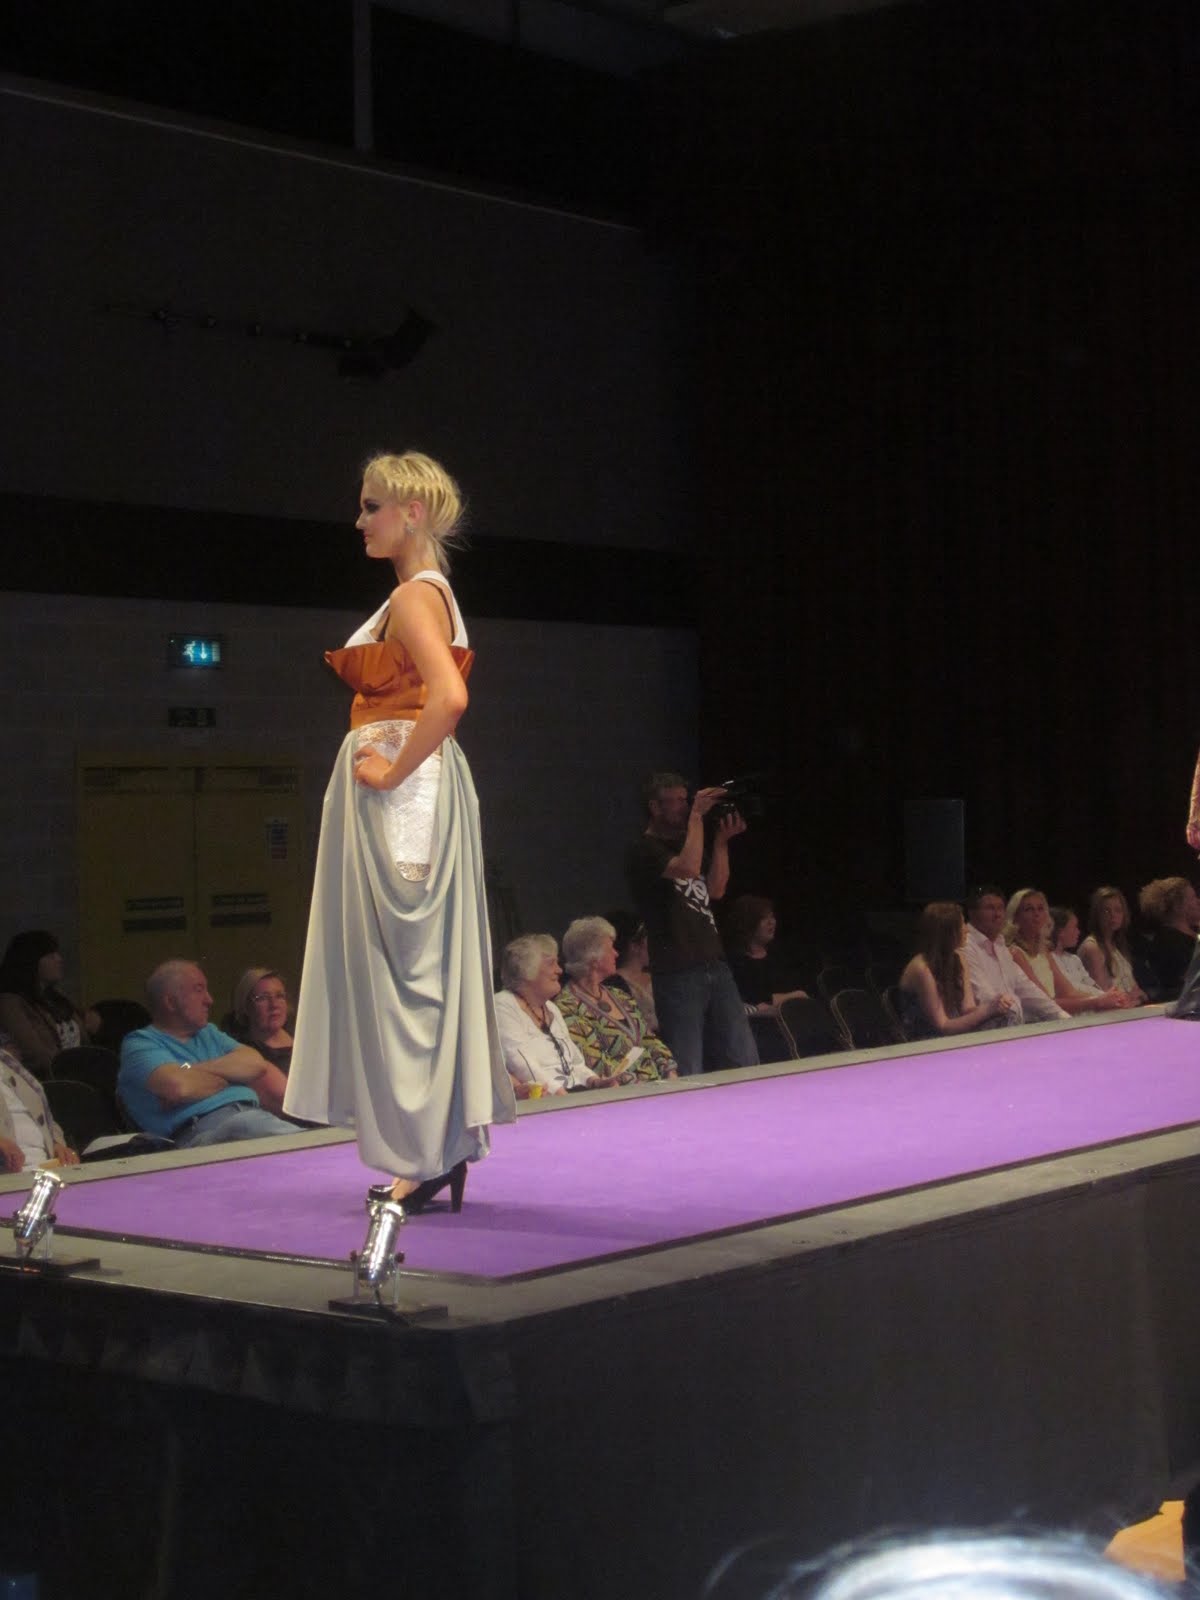
Below are pictures of Lauren's final dress design...


I love how Lauren has used 'Royal Mail' this almost conveys the dress is like a package?

Powder Puffs...

Whilst visiting Manchester University I came across a textile student 'Sophie Penford' who had also used powder puffs in her work. However she had ironed them flat using a much thinner fabric silk. Must of took her a considerable amount of time but looked great...

All of her designs are part of her silk collection...


Visiting Manchester Uni..

As part of a college trip we visited Manchester University. This gave me a insight as to what work is expected at university level. Although I do not necessarily want to do the design side to fashion it was really good to see what other degree students had done and the garments they had created...

Here was a few that stood out to me
Reminds me of Karen Millen!
I liked the way the dress was layered at the top looks really effective.
Current season colours was interesting to see how people have interpreted this into there work.

Pictures of final dress design:)


Creating my powder puffs..


From my initial research into my theme I wanted to create powder puffs on the straps of my dress although this is a very time consuming method I felt it would be worth while once they are all attached to my final garment.

My inspiration came from a Haute Couture book. The picture below
shows a Chanel piece this looked amazing! So from this I decided to use a range of colours of fabrics and contrast them together using the powder puff technique.

Below I placed my powder puff's where they were going to be positioned on my garment before I hand stitched them on this showed me how many more I would need to make etc. My puffs in comparison to the Chanel garment have not been ironed flat I felt this gave my garment more volume this was the look I wanted to make the gold stand out.
Process of them being attached to my garment...
Front view...
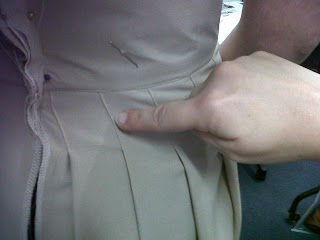
- As I started to attach more puffs to the waist band I felt it looked better and added more shape highlighting the waist area.
Here is the back view of the my dress (zip still needs to be fitted)

Thursday 16 June 2011

Fittings week..

Fitting week is all about getting your final garment fitted to the correct size model this ensures any alterations can be made in time for the fashion show ...

During doing my alterations I put together a list of what needed to be done in order for my garment to fit the model correctly.

1. As I have created many powder puffs on my dress I must ensure they are evenly placed on the garment, the powder puff method is very time consuming this
will be done in time for the fashion show.

2. I have left a gap where the two straps on my garment are going to cross the pins on the picture indicate this.


3. I have to unpick the top stitching half way to stop the material from pulling this will then give me more ease around the hip.

Creating my final garment..

(Carrying on from toile notes below)
Firstly I had to get my final pattern pieces un suring they were firmly pined to my garment. I had to consider a lay plan to ensure I was not wasting any material.
- Picture above shows where I opened up the pleated skirt to get the inital length of the skirt, I then did the same but for my waistband on the same fabric as the skirt and the waistband are the same colour.

Problem ?!- At this stage looking at the skirt I feel it may be too long, however I can adjust this on fittings week.

- I cut the waistband and then moved the waistbandup because I need the pattern cut out twice for the front and back waistband. Picture below of front and back waistband with interfacing for strength.
-Once I had all the fabric cut out. I moved on to creating my straps I pined the strap pattern piece to the material but bit lots of pins as the ensured it stayed in place as the fabric was very hard to cut.
-After cutting my straps out of my black material. I got my pattern piece and cut the same pattern out of interfacing to give the straps on my dress more strength.

- I then ironed the interfacing onto my fabric however I did not overlock my fabric because the interfacing stops it from fraying and the straps are going to be bagged out picture shown below...
- I then ironed my interfacing onto my front and back waistbands I also added interfacing to the waistband as I wanted the waistband to be strong to hold the weight of the pleats.

I then joined the straps together using a 1.5 seam allowance leaving a 20cm gap so there waas room for me to bag the straps out.
Creating my pleated skirt ...

- Firstly I attached my pattern piece to the fabric putting pins where the pleats lay, using my pattern pieces I then added 1.5 seam allowance to my fabric.

Picture shown below.
I then marked on the pleats with Taylors Chalk where the pleats lay I pinned them equally in place so they were all a equal distance.
Where the pleats had been pinned I sewed 5cm on each pleats to hold them in place. Ensuring each one was equally 5cm in length.Adding a zip into my final garment..
I measured the zip and came to the conclusion that it was to long so I shortened it picture shown below this then was the right length for my skirt.
I then sewed a 1cm hem to the bottom of the zip to the skirt. I used a tacking stich to place the bottom of the zip to the top of the waistband.